Sunday 22 August 2010

Rice, Green beans and Chicken breast

Today I wasn't really in the mood for cooking, but we have to eat so I had to quickly think of something I could throw together. So I decided to make my mum's rice, the green beans in a tomato based sauce and fried chicken breast. They taste nice together and they are filling. 


Vermicelli And Rice


Recipe:

Serves 4 people

1 1/4 cup Arborio risotto rice, rinsed
1/2 onion chopped
1/2 cup vermicelli, broken into small pieces about 1 inch
1 full tbsp Ghee (if you haven't got ghee, you can use butter, but I recommend ghee, better flavour)
1/2 salt
1/2 chicken stock cube
2tbsp olive oil

Fry onions in 1 tbsp olive oil until soft and set aside. Fry vermicelli in 1tbsp olive oil until golden brown, don't worry, it will not burn or taste bad later on in the rice. Add onions and ghee. Fry for about 30 seconds and add rice. Fry all of this for about a minute and put it in your rice cooker with the salt and stock cube. Add 2 1/2 to 3 cups boiling water. Let the rice cooker do it's magic and you have a very tasty rice. 


To go along with the rice, I made a simple green beans in tomato sauce. 


Green Beans in Tomato Sauce


Recipe:

200g green beans (washed and cut into a little longer than 1/2 inch pieces)
2 tbsp tomato purée
1/2 onion, chopped
1/2 tsp salt
2 - 3 tbsp oil
1 beef stock cube (normally you make this with lamb, you boil 500g lamb until tender, and then follow this recipe)
3 cups boiling water

Fry the onions in the oil until slightly soft and add the green beans. Fry for a further 2 minutes. Add water, tomato purée, salt, stock cube and let it simmer with lid on until the sauce has thickened, about 30 minutes or so, and until the green beans are tender. 

Serve with rice and enjoy!


Fried Chicken Breast


Recipe:

3 chicken breast, cut into medium sized strips
Marinade in any marinade you like while you get all the above ready. I used 1/2 tsp paprika, 1/2 tsp all seasoning, 1/4 tsp salt, 1/4 tsp pepper and 2tbsp oil. 

Heat up a pan with 3tbsp olive oil, fry chicken pieces until cooked, press against the meat with a spoon, if it feels firm, it's done. Don't over cook chicken or you will dry it out. As long as it's not pink in the middle, you're good to go. 


Wednesday 18 August 2010

Chocolate cake, quick and easy dessert.

I wanted an easy and tasty dessert this evening, so I thought I have a cake mix in the cupboard, so why not turn that into a chocolate cake. This cake mix is by far the best cake mix I have ever tried. The cake comes out extremely soft, and spongy, it's mouthwatering. You can either have it plain as it is, or you can turn it into a chocolate cake like I did, or even add frosting. It's good no matter what you do to it.


The box is called Rich'N moist White Cake, it is by J. F. Mills. I found mine in Asda where the Asian food section was. Click here to see the packaging.

Just follow the instructions on the back, but make sure if it says mix on whatever speed for what ever time, you do the exact thing. Otherwise you will either mix it for too long or too short and it will not achieve that consistency it needs for the cake to turn out as soft as it should.

I added 3 full tbsp of cocoa powder, and two extra tbsp of water. But only because I was craving for a chocolate cake, otherwise, leave it as it is. Its a perfect cake to make a birthday cake out or even cupcakes. I tried it once, and it was really good, but it will be very obvious in the texture and flavour that it was not home-made and that it came from a box.

I used a 9'' round cake tin, which I greased with butter and dusted with flour. Put it in the oven for 40min on 180 degrees. Some oven's cooking times vary, so always do the clean knife test. Stick a knife in the centre, if it comes out clean, it is ready, if not, add an extra 7min or less and check again. Do not over cook it, as soon as the knife is clean, it is done. I hope you enjoy it as much as I have this evening.

Pasta Bake, Quick Easy Meal For A Lazy Day!

As it's Ramadan, I thought why not try something quick for dinner tonight because I was quite hungry and tired today. So I remembered something I had at my friend's house. I had made this before, but it had been such a long time ago. It's quick and easy, hardly takes any time, and it's filling. 

Pasta Bake


Recipe:
Serves 6 (medium portions)

250g Turkey mince
200g Pasta, uncooked
1 full cup frozen vegetable, the smaller the better, boiled 10min and drained
3/4 tsp curry powder
1tbsp all purpose seasoning
1/4 chicken stock cube
1tbsp chopped fresh basil
1/4 parmesan cheese
Grated mozzarella cheese for sprinkling
2tbps Olive Oil

Turn the oven on to 200 degrees (centigrade).

Fry the turkey mince in the olive oil until nearly cooked, add curry powder, all purpose seasoning and stock cube. Cook until turkey mince is cooked through. Put aside.

In an oven proof dish, add pasta (dry, uncooked), turkey mince, cooked frozen vegetables, basil and parmesan cheese. Pour the Homepride Pasta Bake sauce over. Take the empty jar and fill up to the top of the label with cold water, close lid and shake well, pour over the pasta. Mix it all together. It is all written on the instructions on the jar, apart from the extras that I have added. On the jar it tells you how much pasta and maybe some meat to add, and to add water like I have described. 


Once all mixed, put in the oven for roughly 15 min, take it out, give it a good mix so all the pasta soaks up the juices and goes soft. Put back in the oven for 10min. Take it out and check if the pasta is soft, if not and it looks a bit dry, add 1/4 cup water, mix and set back in the oven for another 10min. Once the pasta is cooked, or al dente, add the mozzarella cheese on top, put back in the oven until golden. 

You can serves this with a nice salad, or garlic bread, or even both. Hope you enjoy :-)

Monday 16 August 2010

Giada's Ricotta and Chocolate chip homemade ice cream

This is a recipe from my all time favourite chef Giada De Laurentiis. I tried this for a few months ago with my friends, and they liked it too, although the chocolate chips were a bit much. I think the ice cream was so silky it just melted as soon as it hit your mouth, and the chocolate chips where too big. Next time I make this, I will add grated chocolate instead, so it all melts right away. Either way, here's the recipe. I hope you all try it, do not be scared of using cheese in an ice cream. It sounds strange, but trust me, Giada knows what she is talking about. This recipes is really good.

Ricotta and Chocolate Chip Home-made Ice Cream


Recipe:

425g whole milk ricotta cheese
1 cup whole milk
1 cup simple syrup (1/2 cup water, 1 cup sugar, mix together in a saucepan over medium heat until sugar has dissolved, allow to cool)
1/2tsp vanila extract
1 cup semisweet chocolate chips (1/2cup grated chocolate)

(Ice cream maker)

In a medium bowl whisk the ricotta and milk until smooth. Then add the simple syrup (it has to be cooled down first). Add vanilla extract and mix well. Pour your mixture into the ice cream maker and follow the manufacturer's directions. (remember for most ice cream makers, the bowl has to be put in the freezer for 24 hours prior to making the ice cream)

Add the chocolate chips 10 minutes before you stop the ice cream maker, this is because if you add it earlier, it will sink to the bottom and you won't have it mixed properly and evenly. Anything that is left over, can be stored in the freezer. Enjoy! I know I did.

Mama's Chicken and Rice


I haven't posted anything over the weekend mainly because I was busy with the family and I had a dinner get together with friends for Iftar. It was a lovely evening, with good food and laughter. I hope to be doing it again soon. Here is the recipe for the chicken I made. I hope you guys like it. It is my mum's recipe (hence the name), whenever I go visit my family, she makes me this chicken.


Recipe:


1 whole chicken
1 large onion
1 large potato, or 2 medium potatoes
1 tsp curry powder
1 tsp cumin
1 tsp salt
1 tbsp olive oil
1 tbsp vinegar
3 full tbsp pomegranate molasses 


Wash and cut the chicken into portions. Put in an ovenproof dish. Add diced potatoes and onions. 
Mix all the herbs and seasoning in a small bowl and rub into chicken pieces well. Put chicken pieces skin down. Cook in oven on 200 degrees (centigrade). After one hour, turn chicken skin up and leave for roughly 20-25 min until the chicken is cooked and skin is crispy. The juices that the chicken gives off are really good with rice. You can serve this with plain rice or the rice I have pictured it with. (recipe below) 


Mama's rice (similar to a biryani)


Rice:

1 medium onion diced
1 medium to largish potato, diced small
1 tsp turmeric
1/2 tsp salt
3/4 tsp cumin
4 cardamom pods or 1/2 tsp ground cardamom
1/2 tsp cinnamon
1 chicken stock cube
Handful of frozen peas

Fry onions till soft, put aside, fry potatoes till golden brown, add onions and peas, fry a minute or so, add all the spices apart from the stock cube. Fry for 30 sec, take off the heat. I use rice cooker, therefore I used the little cup provided with the rice cooker to measure my rice. I washed 4 cups (the little cup that comes with rice cooker) added it to the rice cooker, added 5 1/2 cups water (same little cup). Added the onion, potato and spice mixture. Then turned it on. As soon as the water got hot I crumbled in the stock cube, mixed well and let the rice cooker do all the work. (1 rice cooker cup is 3/4 of a normal cup measurement). 

Friday 13 August 2010

Lemon and limeade

This drink is so good with a nice BBQ or even when you have a cold, its packed with vitamin C.

LEMON AND LIMEADE


Recipe:

1/2 cup freshly squeezed lime juice
1/2 cup freshly squeezed lemon juice
1/2 sugar
4 cups water
lime and lemon slice to decorate

Mix all the above ingredients together in jug, add the lemon and lime slices and serve. I decorated the rim of my cup with sugar, because I thought it looked pretty. I know it's not a usual thing to do for lemonade, but it looks nice. Enjoy!

2nd day of Ramadan

As promised I am back with more recipes. Last night I made a dish inspired by my mother in-law, and I say inspired because I do not have the recipe she uses, so I made it up and some of it I found online.

So here it is, the pictures do not do it justice, the dish is so good I could have it everyday.

STUFFED AUBERGINES

Serves 5

Recipe:

500g minced turkey or minced chicken
4 medium sized aubergines / eggplants
1/4 cup chopped spring onions
2tbsp light soya sauce
1tsp monosodium glutamate (msg) optional, but it adds a great flavour
oil for frying

Sauce:
2 cups water
1tbsp dark soya sauce
2tbsp sugar
1 1/2 tsp salt
2tbsp water mixed with 1tsbp corn starch (this is for right at the end before you serve)

In a bowl, add turkey or chicken mince, spring onions, light soya sauce, msg and mix well. Put aside. Cut the aubergines /eggplants on a slight angle, about 1 1/2 inches thick, keep going until you have cut up all four aubergines/eggplants. Take one of the pieces and cut in half, BUT do not cut all the way down. You are only make a slit almost, because in that goes the meat. you are creating almost a sandwich like result. 

 As you can see from the picture above. Continue stuffing the aubergines/eggplants. You might have some meat leftover, but not too much. Make sure the aubergines/eggplants have a good amount of meat. 


Once all done, fry the aubergines until slightly browned. They will require a bit of oil, aubergines/eggplants tend to suck up all the oil, but believe me it will not be oily once cooked. You need to fry them because you need it to go soft during the cooking process later. If you don't fry it and just cook it in the sauce, it will not go soft and it will not have that special flavour you get from fried aubergines. 

In a wok, add the water, soya sauce, sugar and salt and bring to a boil. Once the sugar and salt have dissolved, add your aubergines, making sure majority of it are covered with liquid. Especially the larger sizes. Leave to cook on a medium heat for 15 minutes, then turn some over and the ones not covered with liquid should be swapped around with ones that have been covered in the sauce the previous 15 minutes.  Cook for another 15 minutes or until all the aubergines/eggplants are soft and tender. Remove from the heat. Take the aubergines/eggplants out very gently and place in a bowl. Add the starch mixture to the left over sauce in the wok and put it back on the heat just until the sauce has thickened whilst stirring so nothing sticks to the bottom. Pour the sauce over the aubergines/eggplants. Serve with white rice, not basmati, maybe a Thai rice and enjoy!

Thursday 12 August 2010

Ramadan Cooking

Ramadan Kareem to you all. I have been away for a while, but I am back now with even more recipes as I have been building up to this moment. As you may know, this month is Ramadan. Ramadan is the 9th month of the Islamic Calender. It's a month where Muslim all over the world are going to be fasting from sunrise to sunset in order to re-focus on what is spiritually important in their lives. Every night when it's time for Iftar (when we break our fast), a date is used to break our fast with as it was believed to have been done with our Prophet Mohammed p.b.u.h. 


I will be cooking different food every night and I will be posting it up on my blog for you all. Yesterday was the first day of Ramadan. Below is the recipe and pictures of what we had for Iftar.


Feta cheese and spinach in filo pastry


Recipe:


Filo pastry sheets (6 sheets), room temperature
200g Feta cheese, crumbled
1/2 cup chopped spring onions, white bits too
350g frozen spinach, defrosted and juice squeezed out by hand
1/4 cup chopped flat leaf parsley
100g melted butter
2 eggs lightly mixed
2tbsp olive oil
salt & pepper to taste


Put the spinach in a medium sized bowl and add salt & pepper, crumbled feta cheese, parsely and put aside. Gently fry the spring onions in olive oil until soft, when cooled down, add to spinach mixture. Slowly add egg, little bit at a time, only until the mixture has a little moisture added to it.


Get the filo pastry, lay it down on  a work surface, one sheet a time. The first sheet, brush melted butter on it, not too much, just enough for the second layer to stick to it. Repeat this process with all six layers. Now add the spinach mixture at the bottom end of the filo pastry, almost forming a sausage shape. 


Then gently and slowly, roll it up and cut in half in a slight angle. Put the two pieces in a greased oven-proof pan. Get a sharp knife and make slits, portion sizes, so it is easier to cut when it's taken out of the oven. 


Brush top with melted butter and put in the oven on 175 degrees (Celsius), 350 Fahrenheit, gas mark 3, for 40 min, or until top is golden brown.  


FASOLIA (cannelloni beans with lamb)  

This is a dish prepared and eaten with Jasmine rice. I grew up on this, my mum used to make it for us every so often and it's one of my favourite dishes. I even had to call her last night to make sure I had the recipe exactly like hers. 


Recipe:

serves 4 adults, (large portions)

500g lamb shoulder cut into medium sizes
1 1/2 cups cannelloni beans, dried ones which you need to soak overnight in water
2 heaped tbsp tomato purée
1 medium onion chopped 
3 tbsp olive oil
1 1/2 tsp salt
black pepper


Boil the meat in plain water for 1 1/2 hours, always keeping an eye on the water level being just above the meat. When finished, the water level should be just covering the meat. 
Boil the cannelloni beans in water without stirring it at all for 1 hour in a non stick pot. Once time is up, put aside. You need to keep an eye on this as well and make sure the water is just above the beans. Fry the chopped onions in olive oil till just soft. Add the meat and all its juices to the cannelloni beans, alongside that add the onions as well. Bring back to a boil, lower heat to simmering, add salt, tomato purée and black pepper, do not mix with a spoon, just close the lid and let the boiling of the water mix it all for you. If you mix it, the beans stick to the bottom of the pan. Let this cook until the liquid has thickened. Do not add more water, if you add water, you will lose that thickness of the sauce. You do not want watery sauce, you want it to be thick. 

Serve with basmati rice and enjoy!

Thursday 29 April 2010

LUSH Ma Bar

A few weeks ago I went into LUSH again and couldn't resist buying their Ma Bar Bath Bar. It smells incredibly good, and highly edible almost.... It smells of chocolate, toffee and honey all rolled into one. It cost's £2.45 for 100g, and you can buy it from here. It will last you almost 3 baths. You just have to break it up into three pieces, unless you want extreme bubbles and strong smell. 


I used half of the bar, and I got lots of bubbles, and the whole bathrooms smelt divine. I couldn't wait to get into the bath. Be warned, it does make your bathwater look dirty, and brown and unclean. But I think it's just that little brown part of the bar, it's not a lovely colour for your bath water to be, but you know it's clean and it's only from the bar. You can't really see the brownish colour of the bath, I took these pictures with my iPhone, I'm trying to get a better camera for the future hopefully. 


To be honest I didn't care if it made my skin soft or not, all I wanted was to smells as good as the bar did afterwards. 

In conclusion, I had a very faint smell afterwards, my skin felt normal, not dried out or very soft. It didn't do much apart from smelling nice and making me want to stay in the bath all night long. 

Saturday 3 April 2010

Disposable toilet seat covers

You might think this is a strange post, but I'm a bit of a clean freak....

I found the best thing ever the other day...flushable toilet covers. I have children, and my son is potty trained. When I take him out he needs to use the toilet like the rest of us. Me and bacteria dont mix very well, so i would like to know that I'm letting my son use a clean toilet. I guess I'm a bit like Monica from friends (laughing to myself right now thinking about her and her strange ways).

I bought these flushable toilet seat covers on ebay, you get 30 for £2.99 from here. They are very handy as they come in a little bag that fits in your handbag. They are flushable which i think is great.

Let me know what you think :-))))

Wednesday 17 March 2010

LUSH haul + review

I've been away for a bit now, and the main reason was that I went to Cardiff to visit my friend for a week. I was meant to write on my blog, but after two days of being there I got sick. I'm still recovering, I had a bad case of the 'flu'! Not good at all.

While I was there, before I got sick, I went into LUSH and I wanted to get quite a few things from there. I wasn't too sure what, but I was willing to try a few new things from there. I love the fact that they are natural, not too heavily scented, mostly natural scents. I must admit, at first I couldn't stand LUSH, and I couldn't stand the smell coming from the shop every time I walked past it in Bluewater. My friend from Cardiff somehow managed to convince me to try one of their products and she couldn't stop going on about it. It was 'Buffy'. It looks like a bar of soap, a square one, but it's not soap. It's an 'exfoliating scrub for your seating area' as described on their website. It weighs about 90g, and comes at a price of £5.

It smells very natural, it's hard to explain the smell apart from calling it natural. If you rub your finger over it, your finger gets a little bit oily, and you can also feel all the grainy bits which help exfoliate your skin. 

When you use it, you just wash your hair as normal, and turn off the shower. Wet the bar a little bit and scrub yourself with it. Don't over do it, just a nice light scrub, and put it away. Then you just use your hands to rub the 'grainy' bits left on your skin all over to give yourself a good scrub. You then rinse yourself,. That's it. Just a rinse. Turn off the shower and pat dry yourself and you are done. You will notice your body feels like you have just put baby oil all over yourself. But not greasy to that extent. You don't need to cream yourself at all. You will have lovely soft skin. If you leave the bar in your shower and let it get wet, you will almost ruin it. I recommend you buy the Body Butter Tin.


This bar is what made me go back for more!

This time round, I bought these products:


Daddy-O shampoo was recommended to me by the sales person, after I explained to him what my hair type is like and my scalp, whether its dry or greasy and so on. This shampoo is normally recommended to people with blonde or grey hair, and contains lemons and lime juice to make your hair shiny, for some reason he obviously thought this was best suited for me. I don't regret buying it though. I love the smell. It has a light violet scent. It's so fresh and summery..I can't really explain it apart from recommending you to go and have a sniff yourself. I've used this shampoo twice so far and I love how it foams up so fast and you can actually feel your hair getting clean. Once rinsed, your hair actually feels squeaky clean, like when you use a soap that has no creamy texture to it, your hands kind of squeak? I hope you know what I mean.


I then used American Cream conditioner. It smells so good, it's like a vanilla honey slight strawberry smell...at first when you breathe it in, you don't get all that smell, but it's the after smell where it all comes out, when you breathe out. It contains honey water, vanilla pod infusion, oranges, strawberries along with other stuff... 


The conditioner isn't as thick as other conditioners from other brands, mainly because it is very natural, but nonetheless, it works really well. I applied it to my hair, washed my body, and then rinsed it and brushed my hair after I got out of the shower. I roughly blow dried my hair, and my hair was so soft. I loved it. Normally I need to straighten my hair for it to feel soft, but this time it felt soft just after blow-drying it. It's also quite shiny.
I recommend you put the conditioner on away from your roots. Conditioner is for your hair where the natural oils from your scalp can't reach. The hair closer to your scalp gets conditioned with the natural oils from your scalp. 

Snake Oil Scalp Massage I have used only once. During winter months, my hairline by my forehead gets very dry and itchy and it's only that part of my scalp. I told them about this and I was recommended to use this bar before I shower. I wet the bar and rub it onto my hands and then massage it into the dry areas. I've only used it once and for some reason it seems as if it has disappeared. I'm actually quite shocked. That's one product I will be using again. Even on their own website people are talking about how it worked the first time they used it. Although it does not smell very pleasant at all. It's very oily, one touch and my fingertips are all oily. I recommend this if you have dandruff, because it really moisturises your scalp and the tea tree oil kills of any microbes that might cause the dandruff. 


Honey I washed The kids is the nicest, yummiest soap I have ever smelt or used in my life. It smells so good I actually want to eat it. But I wont. It kind of smells similar to Werther's Original but with more of a honey smell. It's excellent for me because I can use this on myself as well as my children because it's mild enough for their delicate skin. I used it once, and the smell was on my skin for a few good hours, I kept smelling my arm every so often.

Angels On Bare Skin is a face scrub which is quite good. It has ground almond and some essential oils in it. When it was tested on my hand in the shop, my hand immediately felt soft. It's like a really thick paste, you take a small amount in your hand and add a little water to dissolve it. Once dissolved, you rub it all over your face and gently massage your skin. Rinse and pat dry for soft skin and a glowing complexion. When I took this home and tried it for the first time, everything felt fine, but as soon as I rinsed it off, a little bit went into my nose and I couldn't stop sneezing for at least 10min. I came out from the shower and my face developed a rash, I was scratching all over my face. I guess I had an allergic reaction to the almonds in the scrub.

I took it back and exchanged it for Baby Face which cost £4.10, a little cheaper. It basically is like a little soap bar, but it's not actually soap. It's almost like a hard block of make-up remover. You wet it and rub it in your hands and apply it to your face. Massage in and take of with a little warm water on cotton wool and you will see all your make-up come off. Not recommended for removing mascara. It's not the greatest thing invented when removing make-up, but it works ok and leaves your skin soft.

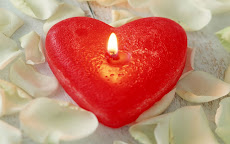
If you have any recommendations or want any more information about these products, please leave your comments below. 


Friday 5 March 2010

Longer Lashes


I have to do this post because I wanted to talk about this weird eyeliner like 'thing' which helps to grow your lashes incredibly long. I have so far had a look at 3 different types. ( I have also done a little research on each of them).

LATISSE (tried and tested by Brooke Shields)


You might not believe these pictures, but you have a look at other people's blogs and their reports, you will see that these products do work.
Im sure there are other products out there that I haven't heard of, but the 3 above I have had a look at. I have looked at results on the websites, as well as other blogs where girls have tried and tested them. They all look AMAZING. The LiLash one, I have seen more before and after pictures of. You might think that it has been photoshopped, but it's not!! If you have a look at this blog by B U B B L E G A R M, you will see what I mean. I love her blog, and I have taken advice from her before. She is currently trying this product out and posting her views about it. 

This is quite pricey though, but according to what I have read from others, it lasts over 6 months. So really and truly it is worth that money when you think of the results. I know you must be thinking where's the catch right? Well, the catch is that once you stop using these products, the lashes do fall out, not make you go bald, but the lashes will return to original length. 

There are side effects to each and everyone them. The ones that I discovered whilst researching last night, were as follows:
  • itchiness
  • red eyes
  • sore eyes
  • skin pigment discolouration around the area where you apply
  • dark circles around the eye
  • darkening of your eye colour permanently if your eye colour is blue, green, grey or hazel (this was only reported with Revitalash)
  • hair growth in other area of the face
  • lashes breaking off by themselves or when using eyelash curlers
  • Worsening eyesight (reported with Revitalash)
Those are some of the side effects I found out about. LiLash and Revitalash had most of those side effects, whereas Latisse had less serious ones. According to their website:

''LATISSE® (bimatoprost ophthalmic solution) 0.03% is the first and only prescription treatment approved by the FDA for inadequate or not enough eyelashes, growing them longer, fuller and darker.''

Personally if I had the choice to choose which one I would go for, it would have to be LATISSE. Although the other ones work really good, and I have seen a lot of before and after pictures, but the side effects are a little scary. BUT the side effects, according to the information I found, have affected less than 10% of the people who have used them.

I am not a health professional, and all the information I have given above are from research I did using Google search engine. If you are willing to try these products or you are going to buy them, please do your own research too and consult your doctor before you try any of them. 


Coastal Scents 88 Matte Pallette


I love eye-shadows and I love experimenting with new colours. Although not too bold, more subtle ones, nonetheless, I like playing around with them. I used to buy one from here, and there, it came to a point where I had actually bought too many and had no space for them, or I would lose them.

I had heard about Coastal Scents for a while, but if you were to order from them, you would have to order from their website. You can buy their products online from eBay, but I don't actually trust buying brands from eBay. So I decided to order from their website, which is American, meaning you would most likely have to pay a customs fee when it would arrive to the UK. (which I did, £11 for my order)

I ordered a few things from them. I will talk about those later. But for now, I will give you a review on their 88 Matt Palette which I love. 


It's worth every penny. When you first see the palette, you will be surprised at how small it is. You would think it would be a bit bigger since there are so many colours in there. At least that's what I thought when I first saw it. I opened up the palette and had a look at the colours. They are so tiny. 


As you can see they are a little smaller than a penny. BUT they last long. Not to mention, they stay on your eyelids all day long without creasing, or fading, whether you're wearing an eyeshadow primer or not. Usually a couple of coats is more than enough, which is why they last. I have had this palette a while, and I still haven't gone through all the colours, but I will!! My favourite colour is the orange colour below:


As you can see, I have used that one quite a bit compared to the other colours. Although the palette is matt, this orange and a few others have a bit of shimmer in them. Now I haven't taken any pictures of this colour on me, but I will soon and I will put the pictures up here. I think its a really nice colour whether you only wear this one, or whether you mix it with other ones. I will be buying the 88 Shimmer Palette one day soon, because I am more into shimmery colours than matt ones at the moment. 

If any of you have bought Coastal Scents before from a trusted seller in the UK, please let me know so that I don't need to order from the US and pay another customs fee. 

Thursday 4 March 2010

How I store all my Jewellery (there's a lot of it)


I absolutely love love love earrings, the bigger the better!! I have a ton and I wear every single one (obviously not at the same time) with different outfits. For the time being, living in such a small flat with hardly space for anything, I have had to think of different ways of storing them without damaging them in drawers where they would all be mangled. 

I thought of this method years ago when I was in university and I had a tiny little room and too much jewellery. I wanted to have all my earrings within reach and displayed in a way where I could see them all at the same time. So when I got dressed and I was looking for a particular earring I would see it straight away. 

This is how I store my earrings:


Basically what I did was hammer two large oval nails in each end, and one in the middle. Then I used a thick thread to tie around one end and over to the other end and back again a couple of times to make it secure. That way you just hang up all your earrings on that same line. Easy access and neatly stored (sort of). It might not be everybodies taste, but this is how I like storing my earrings. 

I have done the same with my necklaces too, as you can see below:

My bracelets are below my necklaces in their own jewellery box. I buy my jewellery from almost anywhere and everywhere. Here are some of the places where I have bought from in the past:


The list is quite long, but those are a few places that I buy from. 

Let me know some of your storage solutions that I can maybe use in the future. 


Grilled asparagus and melon salad


It's a beautiful sunny day in London and I am imagining summer. I'm looking forward to summer, and going to the park with my children, and barbecues.... ahhhhh the joys of summer...let's just hope that we will have a warm summer this year. The last warm summer that I can remember was in 2005. It was beautiful. It was hot almost everyday. So I pray that this summer will be the same too.

Here's a recipe which is an excellent side dish to all your barbecue meals...I think it works well with most summery dishes. This recipe is by my all time favourite chef Giada De Laurentiis. This woman's food is amazing. tried and tested by me.


Ingredients:
  • 500g fresh green asparagus, stalks trimmed
  • 1/2 melon, any sweet melon, cut into small bite size pieces
  • 1pack mini mozzarella pearls (125g) 
  • 2tbsp Extra Virgin Olive Oil
  • Toasted pine nuts or salted peanuts, chopped (optional, gives the salad a bit of saltiness) 
Vinaigrette:
  • 2tbsp fresh lemon juice
  • 2tbsp Extra Virgin olive Oil
  • salt and pepper


 Instructions:

Toss the asparagus in a bowl with 2tbsp Extra Virgin olive Oil until well coated, season with salt and pepper.

Grill the asparagus until tender, but still crispy 
In a bowl using a fork, whisk the lemon and Extra Virgin olive Oil well together, season with a little bit of salt and pepper. In a large bowl, mix this with the melon and the mozzarella pearls. 

Lay the melon and mozzarella over the asparagus, and pour over the left over lemon and Extra Virgin Olive Oil vinaigrette over the salad. 
You can now garnish the salad with your toasted pine nuts or crushed peanuts and enjoy!